How to Record Screen on Apple Mac
To take a screenshot or record your screen on a Mac, you can use built-in tools provided by macOS.
You can easily record a screen on your Apple MacBook Pro or Air using the preinstalled applications without installing any other software or apps on your Mac computer. Using the Screenshot toolbar and Quick time player, you can record the entire screen or portion of the screen with audio.
- To open screenshot toolbar: Shift + Command + 5
- New screen recording on Quicktime player: [command+ control + N
- To stop recording: command + control+ ESC
How to Record the Screen on Mac using the Screenshot toolbar
With the screenshot toolbar, you can take a screenshot and record the screen. Refer below for step-by-step instructions on how to screen record with audio on Mac computer.
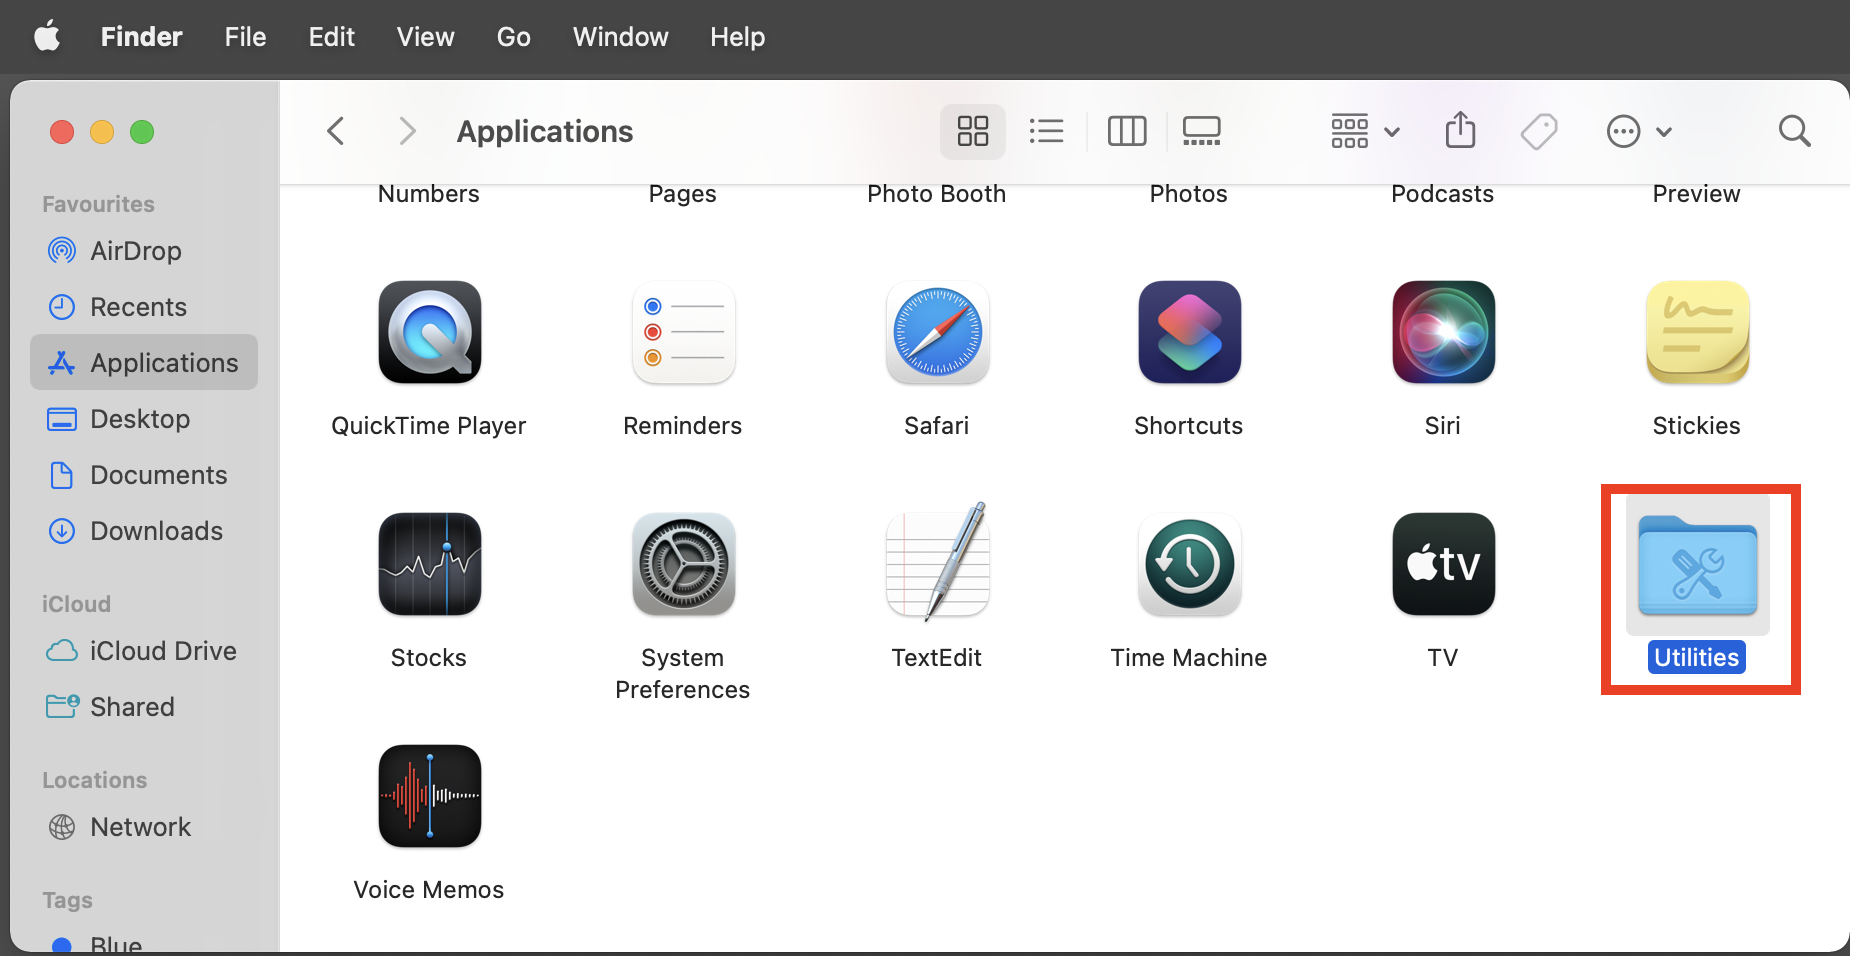
Step 1: On your Mac computer, open a Finder
Step 2: From the left side menu of Finder, click on “Applications”
Step 3: Open Utilities from the Application folder
Step 4: From the utility folder, click on the option “Screenshot” toolbar
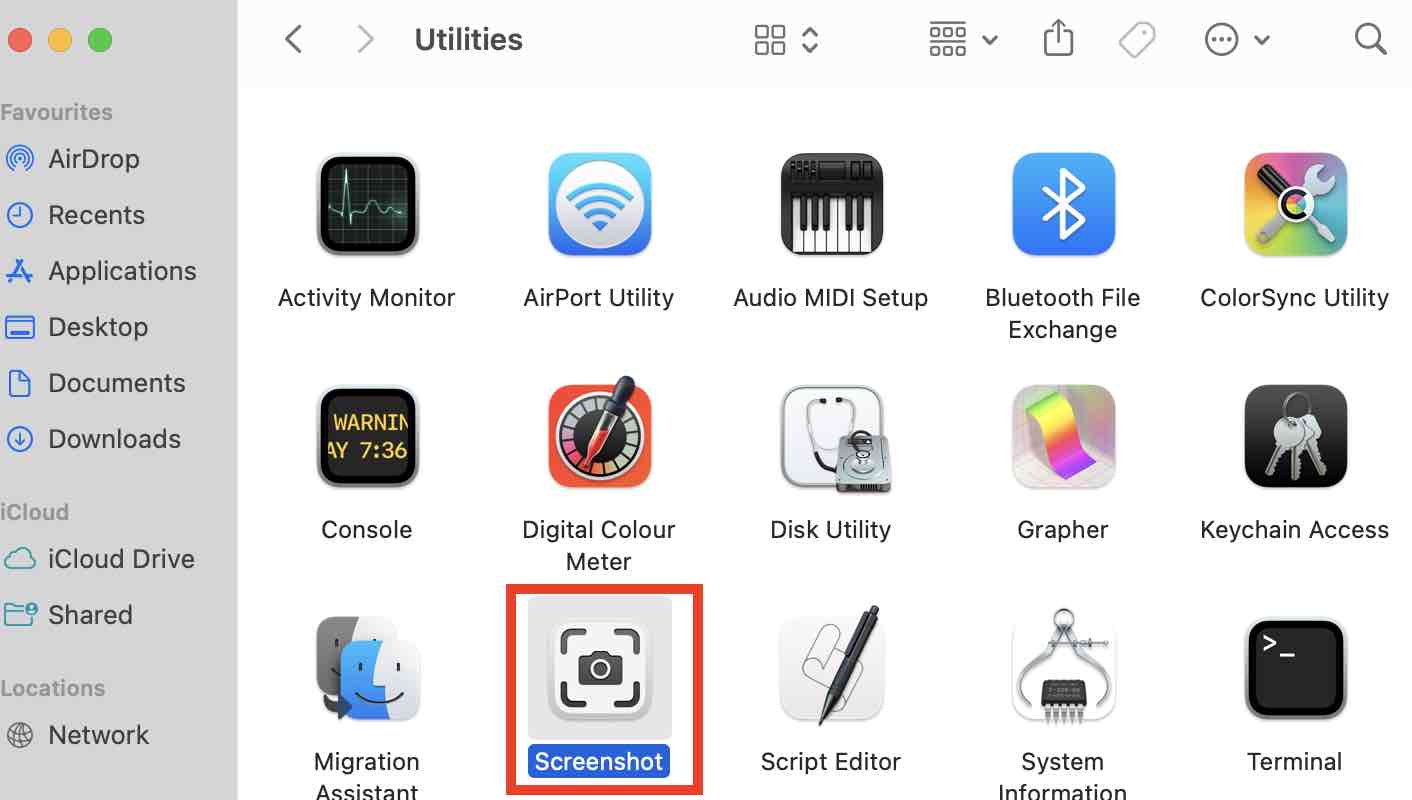
Quick navigation to open a Screenshot toolbar: Finder > Applications > Utilities > Screenshot
Step 5: Now, it displays with controls to record a screen and capture an image.
- To record the entire screen: The 5th button allows you to record the whole screen on your Mac.
- To record a selected portion of the screen: The 6th button allows you to record the specified screen. Click on edges, drag to the selected screen, and click on the “record” option.
Step 6: To record your voice with screen recording, click the option from the control menu > choose the microphone
How to Screen Record on Mac using Quick time player
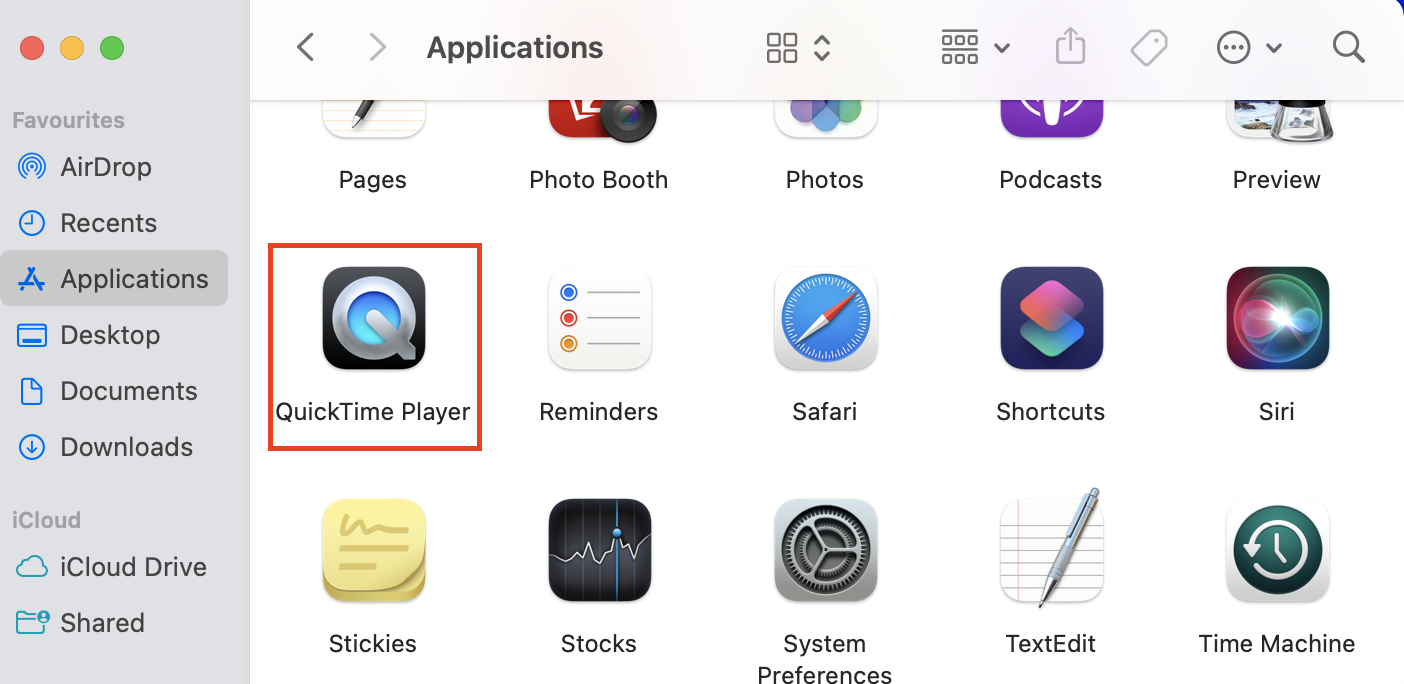
Step 1: On your Apple Mac computer, go to Finder > Applications > QuickTime Player
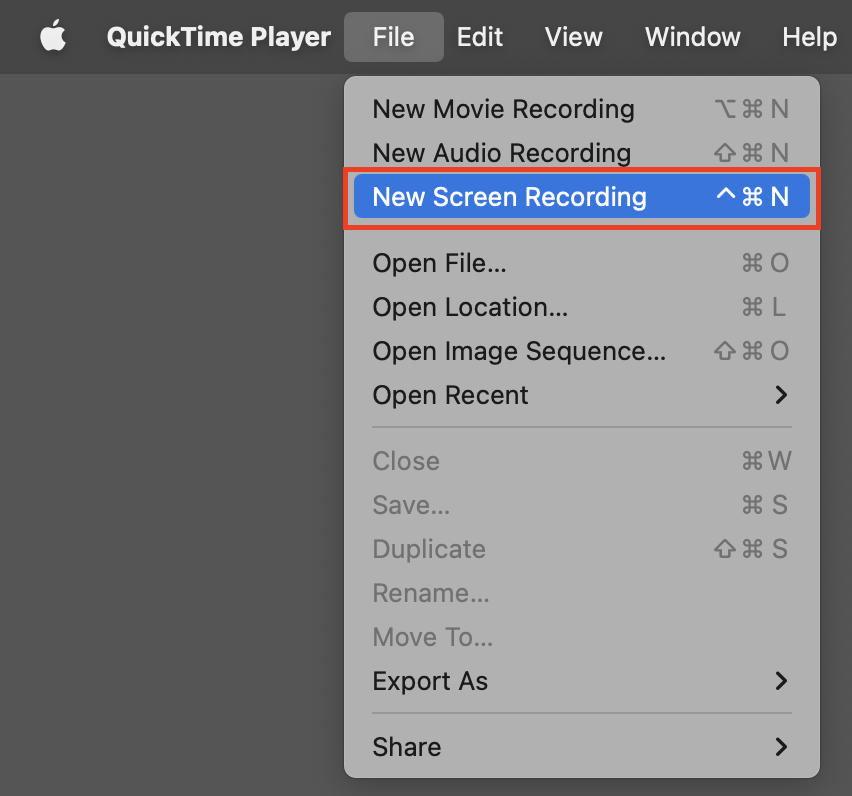
Step 2: From the QuickTime player menu bar, choose File > and then click on “New Screen Recording”
Step 3: You will see a control toolbar; click on a record to make a video recording. If you see a red icon, click on the red icon to start recording,
Step 4: To stop the screen recording, press the keyboard keys with a combination of command + control + ESC.
The screen recorded video will be saved on your desktop screen by default. Now you can play, edit and share the screen-recorded video.
Leave a Reply