An ultimate guide on how to screenshot on Mac computer step by step using keyboard shortcut keys and screenshot application.
Capturing a screenshot on any Apple Mac operating system is a simple process and easily save it on your system. You can take screenshots on a mac by using the Image capture tool or by keyboard shortcut keys.
If you are a new Apple Mac computer and unaware of how to screenshot on Mac, here is a complete step-by-step guide on how to take a screenshot, crop, and save the images on your Mac computer.
How to Take Screenshot on a Mac Operating Systems
You can take screenshots or capture an image on a Mac operating system as per the
After capturing the screenshot of the screen, the image is automatically saved in PNG format at the desktop location on your Mac computer.
A. How to capture Screenshot on the Entire Screen on a Mac system
Follow these steps to take screenshots on your Mac computer for the entire screen.
1. Go to Launchpad -> Other -> Screenshot
2. Choose the option Capture the entire screen, point the mouse on the screen and click to capture the entire screen.

3. Or use keyboard shortcut keys: command+shift+3
B. Take Screenshot on Selected Window
Instead of the entire screen, you can take a screenshot on a particular window as per your requirements. Follow these steps to capture a screenshot as per the selected window on a Mac.
1. Navigate to Launchpad -> Other -> Screenshot
2. Choose the option Capture selected window screen and point the mouse on the particular screen and click on it to take a screenshot of the selected window screen

3. Or use keyboard shortcut keys: command+shift+4
The screenshot is automatically is saved as PNG on a desktop with a name screenshot.
C. Capture Selected portion
The first and second options enable you to take a screenshot on the entire screen and selected window. By using the selected portion option, you can take screenshots for a particular portion of the screen.
1. Go to Launchpad -> Other -> Screenshot
2. Choose the option to capture the selected portion, then crop the required portion and click on option capture.

3. Or use keyboard shortcut keys: command+shift+5.
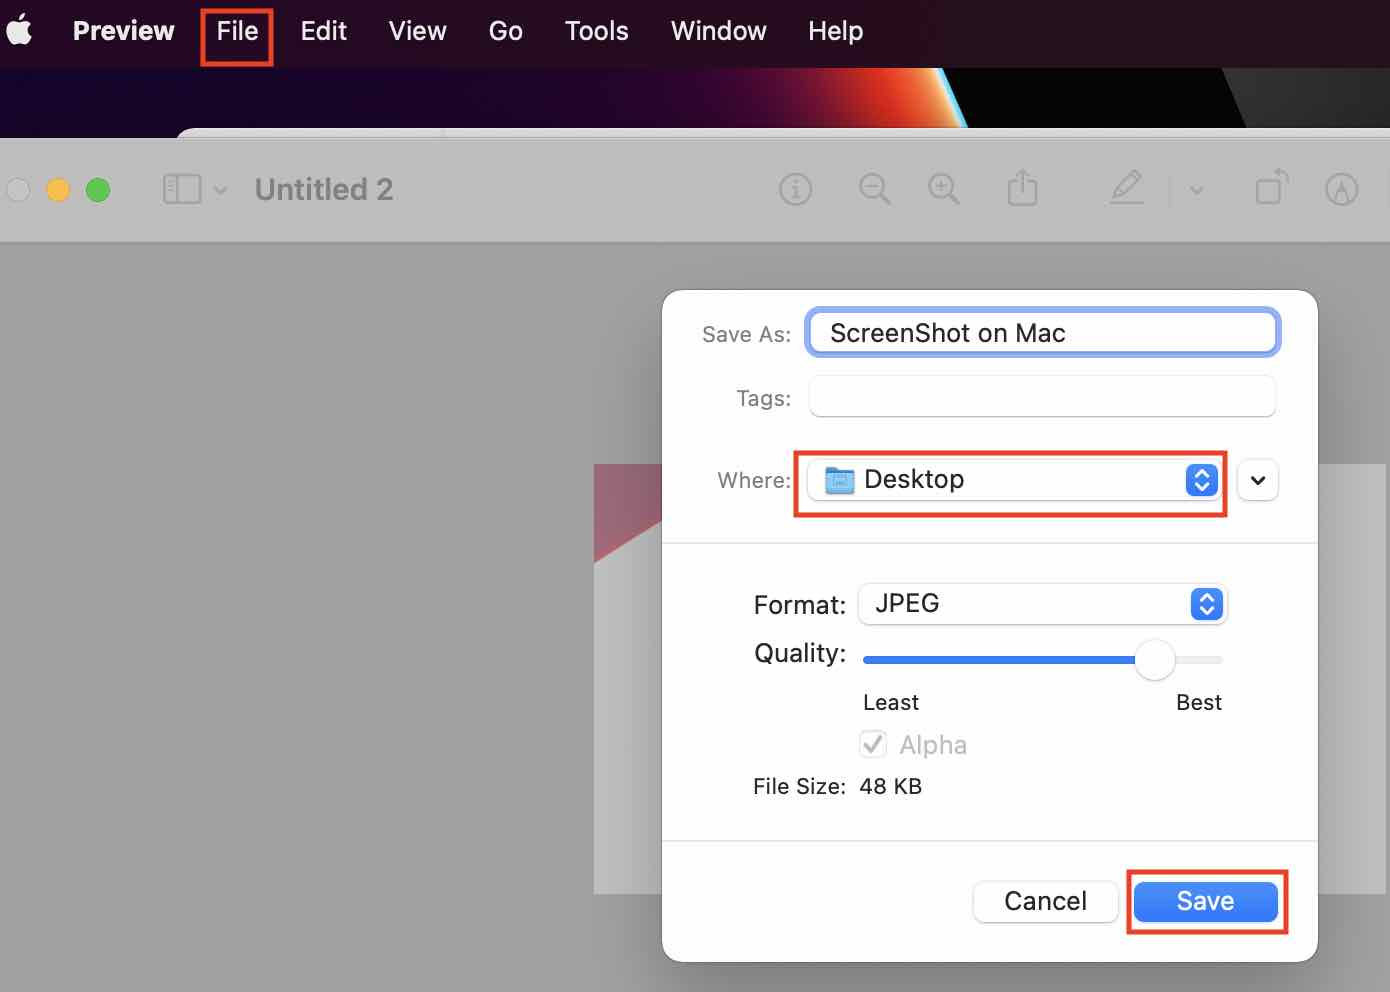
Once you capture a screenshot on your Mac computer, from the menu select File > Save > Give the name for the screen > Choose the Location > Save.
Leave a Reply