In this Digit Guider, you will learn how to add work email on iPhone, iPad, or iPod Touch.
iOS supports different types of Email accounts that you can add to your iPhone and work with your Emails on the go. You can easily add your Work email on your iPhone and start receiving and sending emails.
To add your work email to your iPhone, you’ll need to set up an email account using the built-in Mail app.
Some common uses of adding email to your iPhone
1. Email Access on the Go
2. real-Time Communication
3. Mobile Productivity
4. Flexible Work Environment
5. Integration with other Apps
6. Notifications & Alerts
7. Travel & Remote Work
Note: Before setup work Email, make sure you the following
- Active internet connection on your iPhone
- Email login details – Username and Password
- Outgoing and Incoming Mail server
A Quick Guide: Go to Settings > Mail > Accounts > Add Account > Other > Add Mail Account > New Account > Enter Name, Email, Password
How to Add my Work Email to my iPhone
If you are iPhone, iPad, or iPod touch and looking for a guide with complete procedure, then follow this step-by-step instruction on how to add work emails on your iPhone.
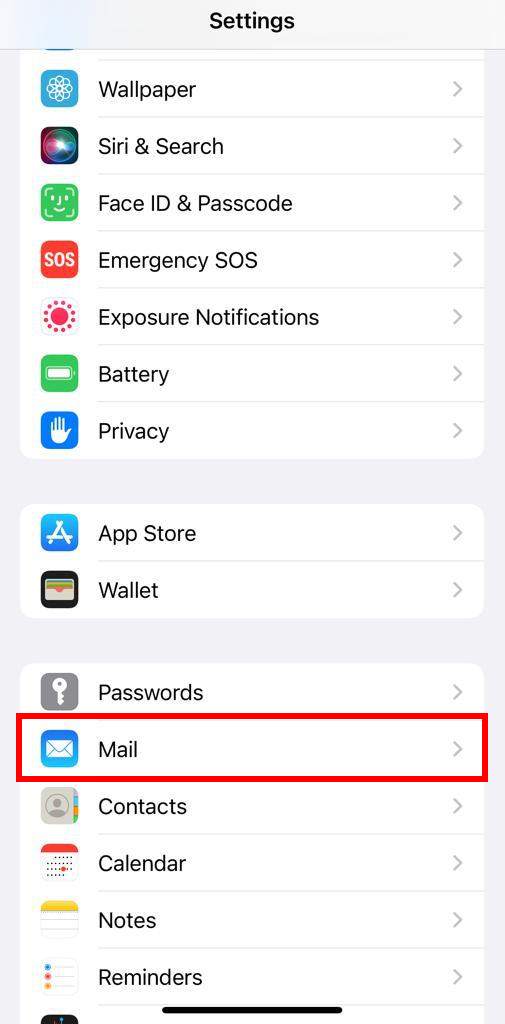
1. On your iPhone, go to settings
2. Scroll down and click on the option “Mail”
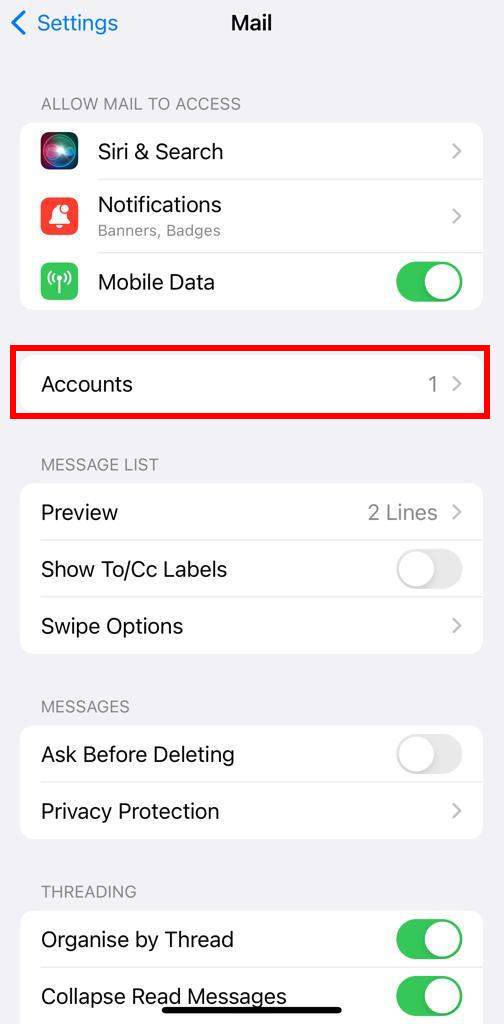
3. Select the option “Accounts“
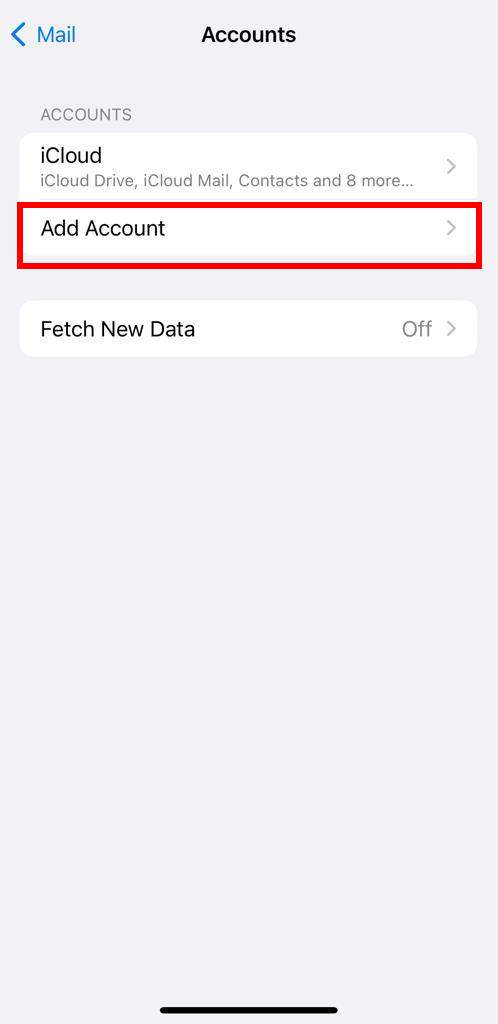
4. Under the accounts section, select the option “Add Accounts“
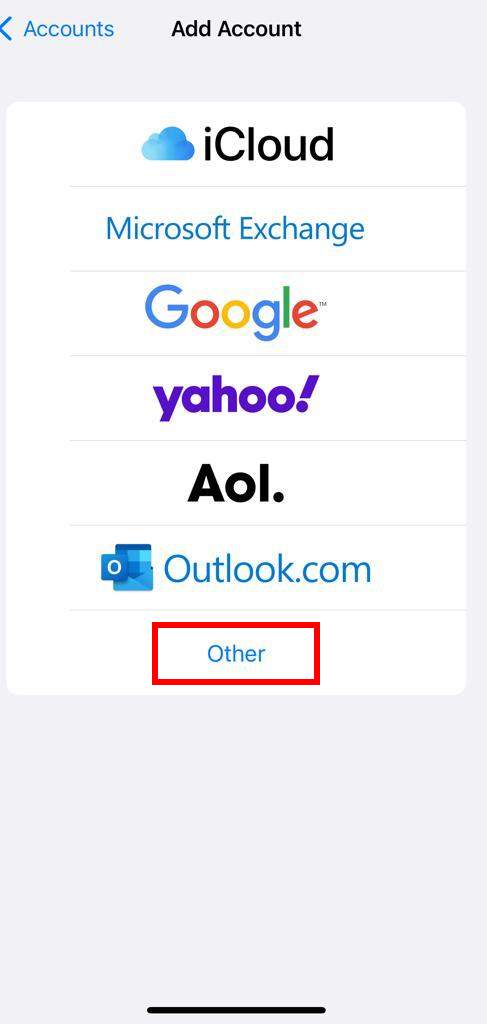
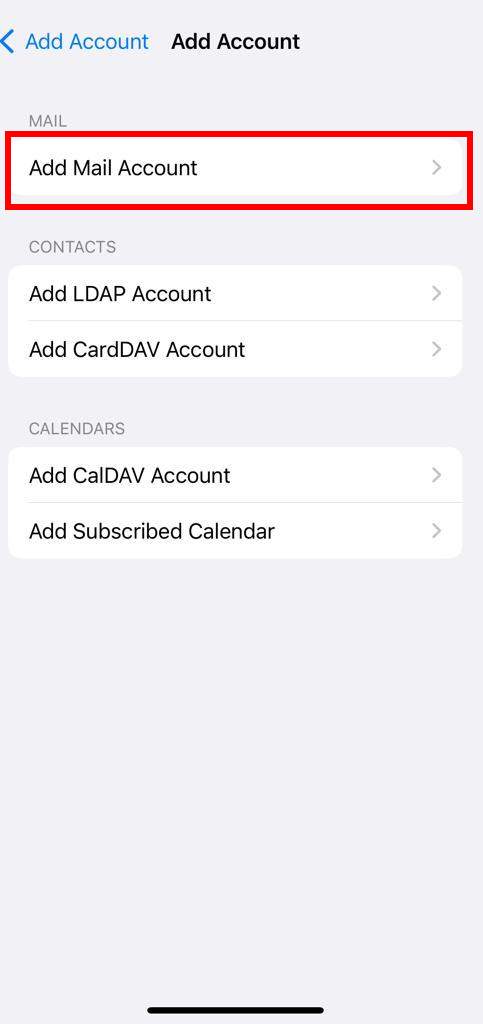
5. Under Add Account section, click on the option “Other”
6. Under Add Account section, click on the option “Add Mail Account“
7. On the new Account section, update the following details
- Name: Enter the name
- Email: Enter your work Email
- Password: Enter the password of your Email
- Description: This field is automatically updated, however you can update it as per your requirements.
8. Choose the IMAP or POP, and update with details of
- Incoming Mail Server
- Outgoing Mail Server
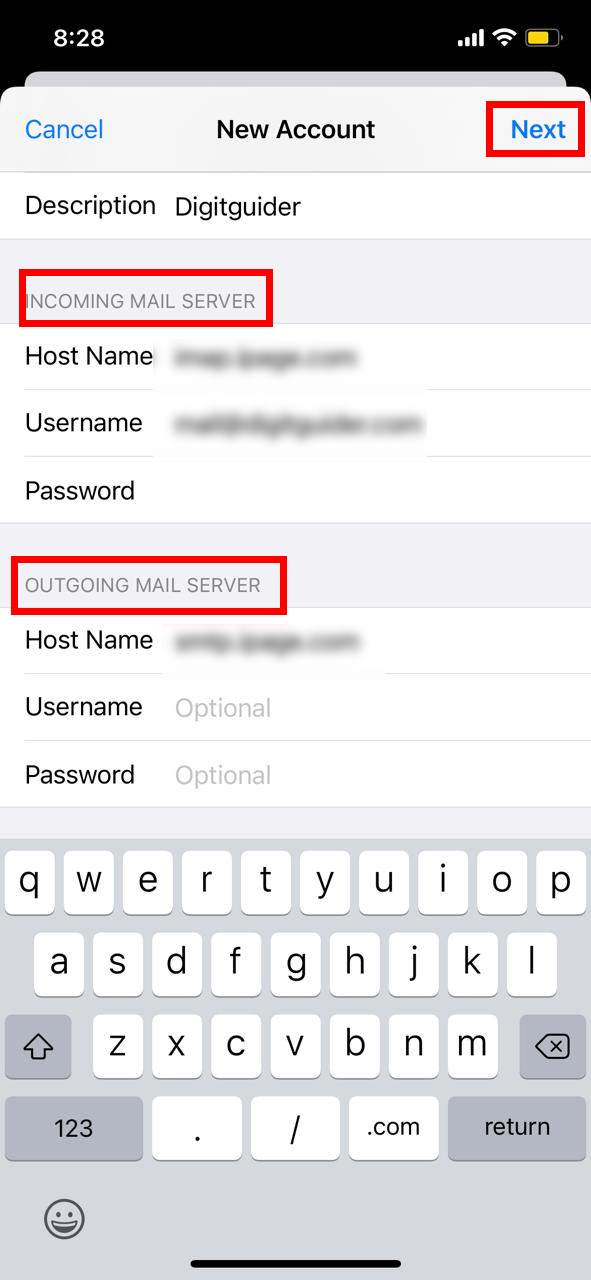
After maintaining the Mail server details, tap on “Next“. If the given details are correct, you will be asked to save or Edit to re-enter the details.
Successfully you have added work email on your iPhone.
How to Send and Receive Emails
After you set up the work email, you can start to send and receive emails.
1. On your iPhone, go to Mail App
2. Under Mailboxes, it displays a list of Email accounts that you have added to your iPhone. Tap on the Email account to send an email or check the received mails.
3. Now it displays a list of Emails in Inbox that you received.
4. To send an Email, at the bottom right side of the Email, tap on the write icon
5. On a new message screen, update with the receiver mail, subject, text, and attachments, and click on send icon to send an email.
Leave a Reply